怎么用图像化钱包(GUI)连接远程节点
这个页面尚未被翻译。 如果您愿意协助翻译,请参见 README
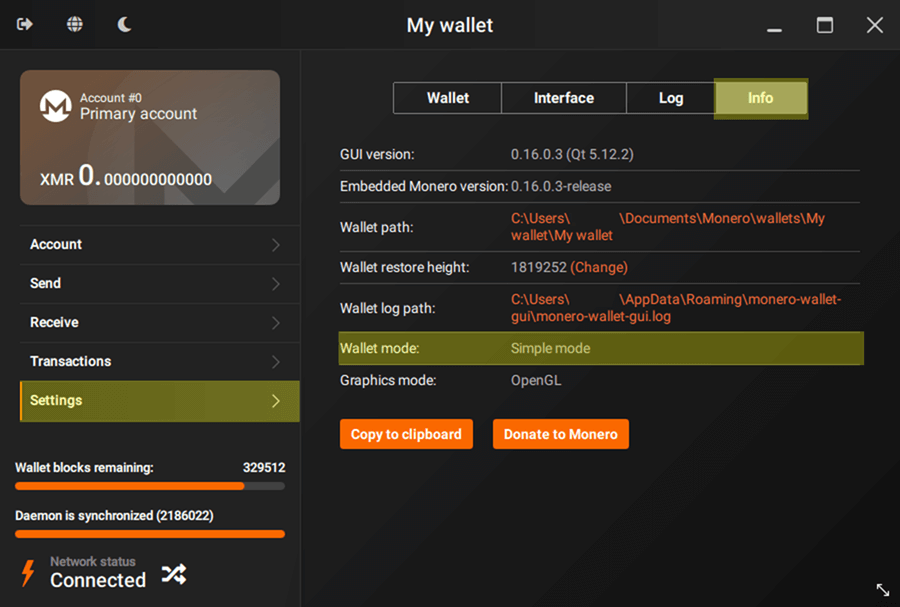
Check if your wallet is in advanced mode
To use a custom remote node, your wallet must be in advanced mode. Simple mode and Simple mode (bootstrap) don't support this feature.
To check if your wallet is in advanced mode, go to Settings > Info and see Wallet mode.
If your wallet is not in Advanced mode, you will have to change it to Advanced mode (see next step).
If your wallet is already in Advanced mode, you can skip the next step.
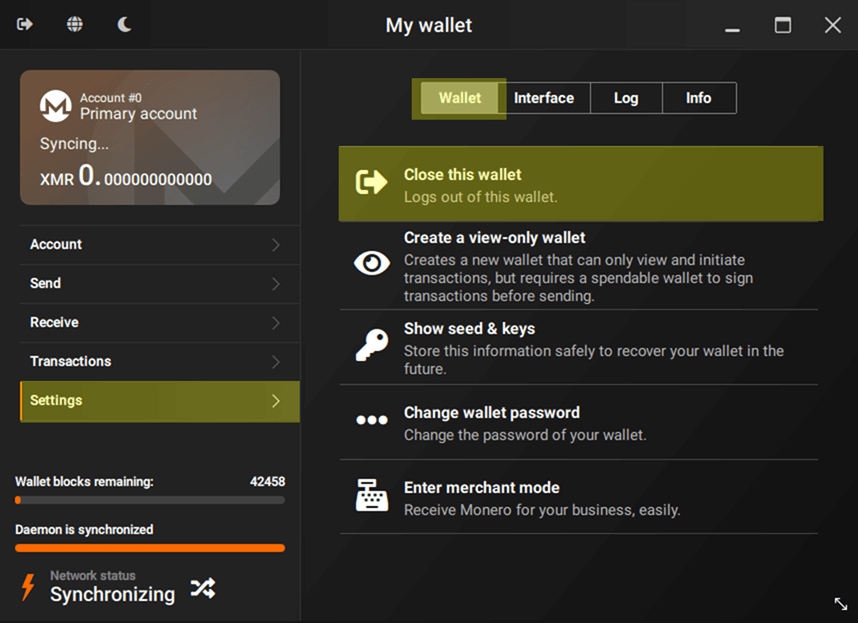
Change your wallet to advanced mode
If your wallet is open, you need to close it first. Go to Settings > Wallet > Close this wallet
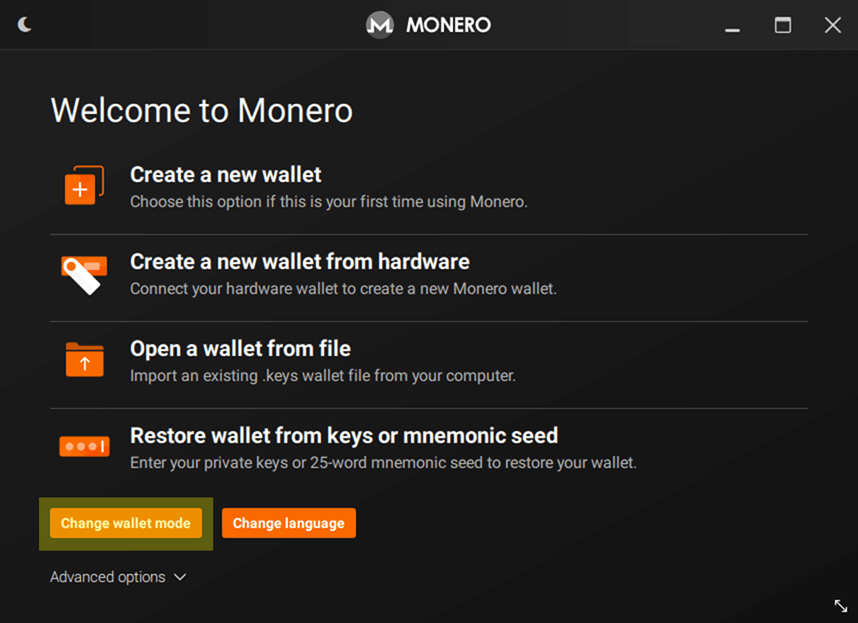
The main menu (Welcome to Monero screen) will open. At the bottom left,
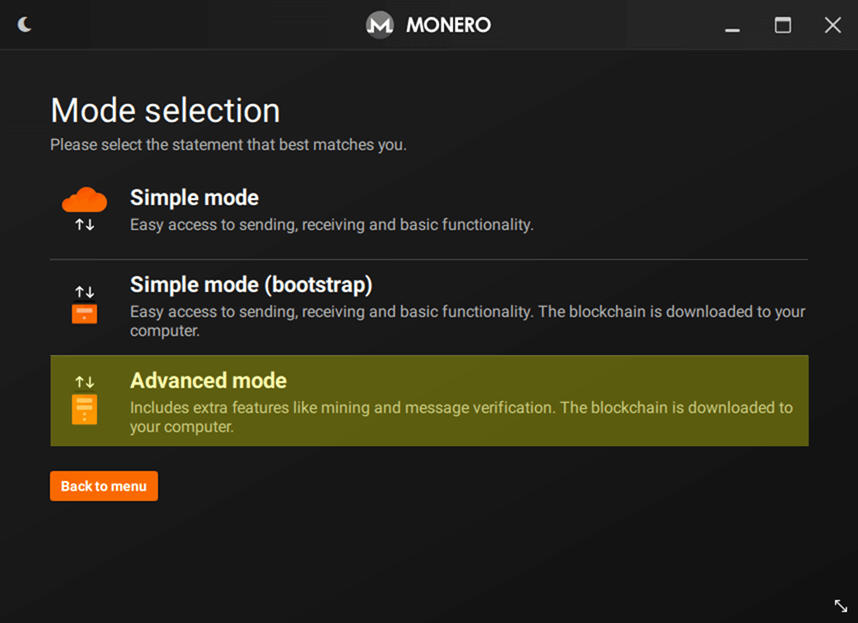
click on Change wallet mode button, and on the next page select Advanced
mode. Next, open your wallet file again.
Finding a public remote node
First, you will need to find a public remote node to connect to. The website moneroworld.com has some great resources about remote nodes, and the website monero.fail has a list of functioning remote nodes.
Configuring your wallet to connect to a custom public remote node
When opening your wallet, a pop up will appear with the option Use custom settings. Click on it, and you will be sent to Settings > Node page.
If you don't see this pop up, go to Settings > Node page.
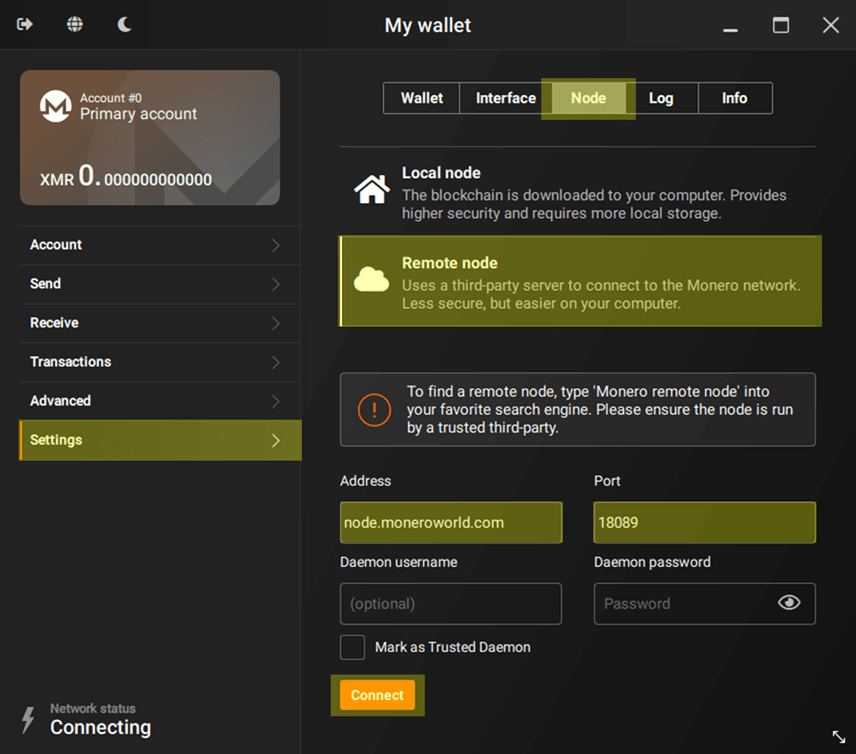
On this page select Remote Node.
In Address you should fill the address of the remote node that you want to
connect to. This address might look like node.moneroworld.com or it could
look like any IP address.
In Port you should fill the port of the remote node. If a remote node is
listed as node.moneroworld.com:18089, the address is
node.moneroworld.com and the port is 18089. The default port is 18081,
but it can vary depending on the node you are connecting to.
If your remote node requires authentication, you can enter a username in
Daemon username and a password in Daemon password.
Finally, click on Connect button and wait for your wallet to connect.